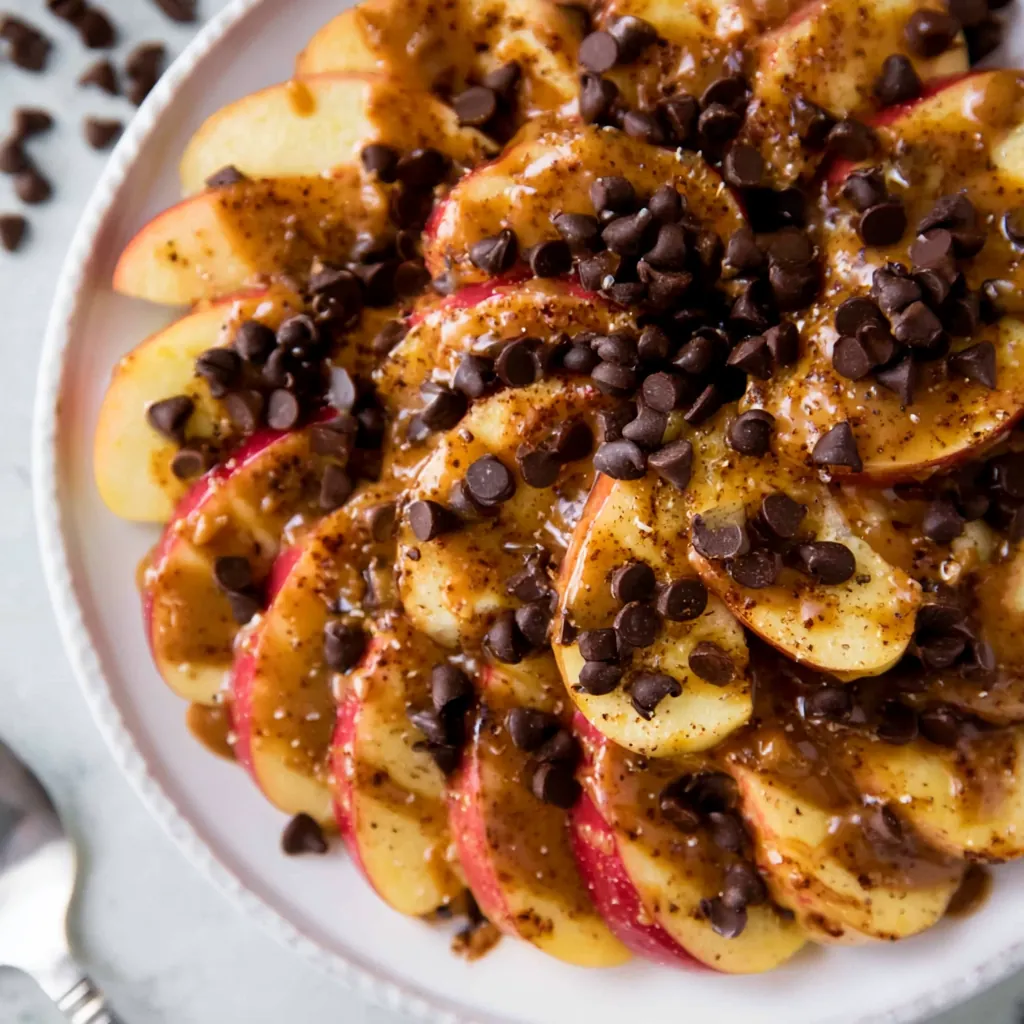
Apple Nachos turn crisp apple slices into a fun, colorful snack that feels special but takes only minutes to make. This simple recipe layers fresh apples with warm peanut butter and dairy-free chocolate chips for a sweet, crunchy bite kids and adults both enjoy. Because this snack uses whole fruit and a short ingredient list, it works well for busy afternoons, playdates, lunchbox extras, and quick desserts. It also fits families looking for a Healthy Snack for Kids, especially when you want something naturally sweet without much prep.
Story
Apple Nachos became one of my favorite after-school snacks because they solve a real kitchen problem: everyone wants something sweet, but nobody wants a complicated recipe before dinner. Instead of handing out packaged treats, I slice crisp apples, warm a little peanut butter, and scatter mini chocolate chips over the top. The result looks playful, yet it tastes fresh and satisfying. Apple Nachos also let kids help in the kitchen. They can arrange slices, sprinkle toppings, and choose their favorite apple variety. Gala apples taste mellow and sweet, Honeycrisp apples add extra crunch, and Fuji apples bring a juicy finish. Apple Nachos work especially well when you need a quick snack that feels like dessert. Plus, since Apple Nachos use naturally gluten-free ingredients, they fit many family snack needs with very little effort.
Ingredients
You need 5 medium apples, preferably Gala, Honeycrisp, or Fuji; 2 tablespoons peanut butter, almond butter, or another nut butter of your choice; and 1/4 cup dairy-free mini chocolate chips. For the best texture, choose firm apples with smooth skin and bright flavor. Peanut butter gives the snack a creamy drizzle, while almond butter adds a slightly toasted taste. Dairy-free chocolate chips keep the recipe dairy free and make these Gluten Free Apple Nachos feel like a treat. You may also add a teaspoon of lemon juice if you need to slow browning before serving, although the snack tastes best right after assembly.

Step-by-Step Instructions
These Apple Nachos come together quickly, so set out your serving plate before slicing the fruit. First, wash the apples well under cool running water, then dry them with a clean towel. Next, cut each apple away from the core and slice it into thin wedges. After that, warm the peanut butter for about 15 to 20 seconds, just until it loosens enough to drizzle. Arrange half of the apple slices in a single layer on a large plate. Then drizzle half of the warm nut butter over the apples and sprinkle half of the chocolate chips across the top. Repeat with the remaining apple slices, nut butter, and chocolate chips. Serve immediately while the apples taste crisp and the drizzle stays soft.
Preparing the Ingredients
Start with fresh, chilled apples because cold apples slice neatly and give Apple Nachos their signature crunch. Wash each apple carefully, then remove any stickers and dry the skin well. Cut the apples into even slices so every piece can hold a little topping. If you plan to prep the apples a few minutes ahead, toss the slices very lightly with lemon juice, then pat them dry before adding peanut butter. Next, place the peanut butter in a small microwave-safe bowl. Warm it briefly, stir until smooth, and check the texture. It should pour from a spoon in thin ribbons. Finally, measure the chocolate chips before assembling so you can sprinkle them evenly over the apple layers.
Cooking Instructions
Although this recipe needs almost no cooking, one quick warming step makes the peanut butter easier to drizzle. Microwave the peanut butter for about 15 seconds, stir, and warm it for another 5 seconds only if needed. Do not overheat it, because very hot peanut butter can slide off the apple slices and soften the fruit. Once the nut butter reaches a pourable texture, build the Apple Nachos right away. Add one layer of apple slices to the plate, drizzle with nut butter, and sprinkle with chocolate chips. Then add a second layer and repeat. This layering method spreads the toppings through the whole plate instead of leaving the best bites only on top.
Tips for Perfect Results
For the best Apple Nachos, slice the apples shortly before serving, use a wide plate, and keep the toppings light enough that the fruit still shines. Thin slices work better than thick wedges because they hold the peanut butter without becoming awkward to eat. Also, choose mini chocolate chips when possible. They spread more evenly and give each bite a little chocolate flavor without overpowering the apples. If your peanut butter feels too thick, stir in a tiny splash of warm water or melted coconut oil until it drizzles smoothly. For parties or After School Snacks, set the apple slices on a platter and let everyone add toppings at the table.
Common Mistakes to Avoid
Do not slice the apples too early unless you treat them with lemon juice, because browned apples make the snack less appealing. Also, avoid watery apples or apples with soft spots since they can turn mushy under the toppings. Another common mistake is adding too much peanut butter at once. A heavy drizzle can hide the apple flavor and make the slices messy to pick up. Instead, use thin ribbons and repeat lightly between layers. Finally, do not melt chocolate chips for this version unless you want a thicker dessert-style plate. Mini chips give Apple Nachos a cleaner texture and make serving easier.
Pro Tips for Better Flavor
Use a mix of apple varieties for a better balance of sweet, tart, and crisp flavors. Honeycrisp brings juicy crunch, Fuji adds honey-like sweetness, and Gala gives a soft floral note. For a richer taste, sprinkle a tiny pinch of cinnamon over the finished plate. If your family likes extra crunch, add chopped peanuts, sliced almonds, or toasted coconut. For a nut-free version, swap peanut butter with sunflower seed butter and check that your chocolate chips fit your dietary needs. When making Apple Nachos for kids, serve them on a bright platter and keep the slices small enough for easy snacking.
Serving and Storage
Serve Apple Nachos right after assembly for the freshest crunch and prettiest presentation. They work well as an after-school plate, a quick weekend snack, a party fruit tray, or a lighter dessert after lunch. Since the recipe makes 4 servings, you can place the platter in the center of the table and let everyone grab a few slices. If you want a more filling snack, pair the Apple Nachos with yogurt, a smoothie, or a small handful of nuts. For younger kids, cut the slices thinner and arrange them in smaller portions so the snack feels easy to hold and eat.
How to Serve
Apple Nachos taste best on a large flat plate where each slice gets a little topping. Spread the apples in overlapping circles, drizzle the peanut butter from a spoon, and scatter the chocolate chips evenly so every bite feels balanced. For lunchboxes, pack plain apple slices separately and add a small container of peanut butter for dipping instead of assembling ahead. For playdates, set out small plates and let kids build their own Apple Slices Snack with peanut butter and chocolate chips. This keeps the snack interactive, fun, and less messy.
How to Store Leftovers
Apple Nachos taste best fresh, but you can store leftovers for up to 1 day in an airtight container in the refrigerator. Before storing, cover the container tightly and place it on a shelf where the apples will not get crushed. To slow browning, toss the apple slices with a small amount of lemon juice before assembly. However, once peanut butter and chocolate chips sit on the apples, the texture will soften. For that reason, store sliced apples and toppings separately whenever possible. When ready to eat, arrange the apples again and add a fresh drizzle of peanut butter.
Conclusion
Apple Nachos make healthy snacking feel fun, fast, and family-friendly. With crisp apples, creamy peanut butter, and dairy-free chocolate chips, this recipe brings just enough sweetness while keeping the focus on fresh fruit. It takes only minutes, uses simple ingredients, and works for school days, weekends, or quick desserts. Try Apple Nachos the next time you need an easy snack that looks exciting, tastes delicious, and keeps everyone reaching for one more slice.
Discover more delicious recipes by following me on Facebook and Pinterest.
Frequently Asked Questions
Can I make Apple Nachos ahead of time?
You can prep the apple slices a little ahead, but Apple Nachos taste best when assembled right before serving. If you need to prepare early, toss the apple slices with a small amount of lemon juice, pat them dry, and store them in an airtight container in the refrigerator. Add the peanut butter and chocolate chips just before serving so the apples stay crisp and the toppings look fresh.
What apples work best for Apple Nachos?
Gala, Honeycrisp, and Fuji apples work especially well because they taste sweet, crisp, and juicy. Honeycrisp gives the boldest crunch, Fuji tastes extra sweet, and Gala offers a mild flavor kids usually enjoy. You can also use Granny Smith if you prefer a tart contrast with peanut butter and chocolate chips. Choose firm apples without bruises for the best results.
Are Apple Nachos gluten free and dairy free?
Yes, this recipe can be gluten free and dairy free when you use plain apples, nut butter, and certified dairy-free chocolate chips. Always check labels on chocolate chips and nut butter, especially if you cook for someone with allergies or strict dietary needs. With the right ingredients, Apple Nachos make a simple gluten-free and dairy-free snack for kids and adults.


Apple Nachos
- Total Time: 11 minutes
- Yield: 4 servings 1x
- Diet: Gluten Free
Description
Apple Nachos are a quick, kid-friendly snack made with crisp apple slices, warm peanut butter, and dairy-free chocolate chips. This gluten-free, dairy-free recipe takes minutes and works perfectly for after-school snacking, playdates, or a lighter dessert.
Ingredients
- 5 medium apples, Gala, Honeycrisp, or Fuji recommended
- 2 tablespoons peanut butter, almond butter, or nut butter of choice
- 1/4 cup dairy-free mini chocolate chips
- 1 teaspoon lemon juice, optional, to reduce browning
Instructions
- Wash and dry the apples well.
- Slice the apples away from the core, then cut them into thin wedges.
- Arrange half of the apple slices in a single layer on a large serving plate.
- Warm the peanut butter for 15 to 20 seconds, then stir until smooth and pourable.
- Drizzle half of the warm peanut butter over the apple slices.
- Sprinkle half of the dairy-free chocolate chips evenly over the apples.
- Add the remaining apple slices on top, then repeat with the remaining peanut butter and chocolate chips.
- Serve immediately for the best crunch and freshest flavor.
Notes
- Serve Apple Nachos right after assembly for the best texture.
- To slow browning, toss apple slices lightly with lemon juice before adding toppings.
- Store leftovers in an airtight container in the refrigerator for up to 1 day.
- For a nut-free version, use sunflower seed butter and allergy-friendly chocolate chips.
- Prep Time: 10 minutes
- Cook Time: 1 minute
- Category: Snack
- Method: No-Bake
- Cuisine: American
Nutrition
- Serving Size: 1 serving
- Calories: 236
- Sugar: 31
- Sodium: 38
- Fat: 8.5
- Saturated Fat: 2.5
- Unsaturated Fat: 5.5
- Trans Fat: 0
- Carbohydrates: 42.2
- Fiber: 7
- Protein: 3.4
- Cholesterol: 0