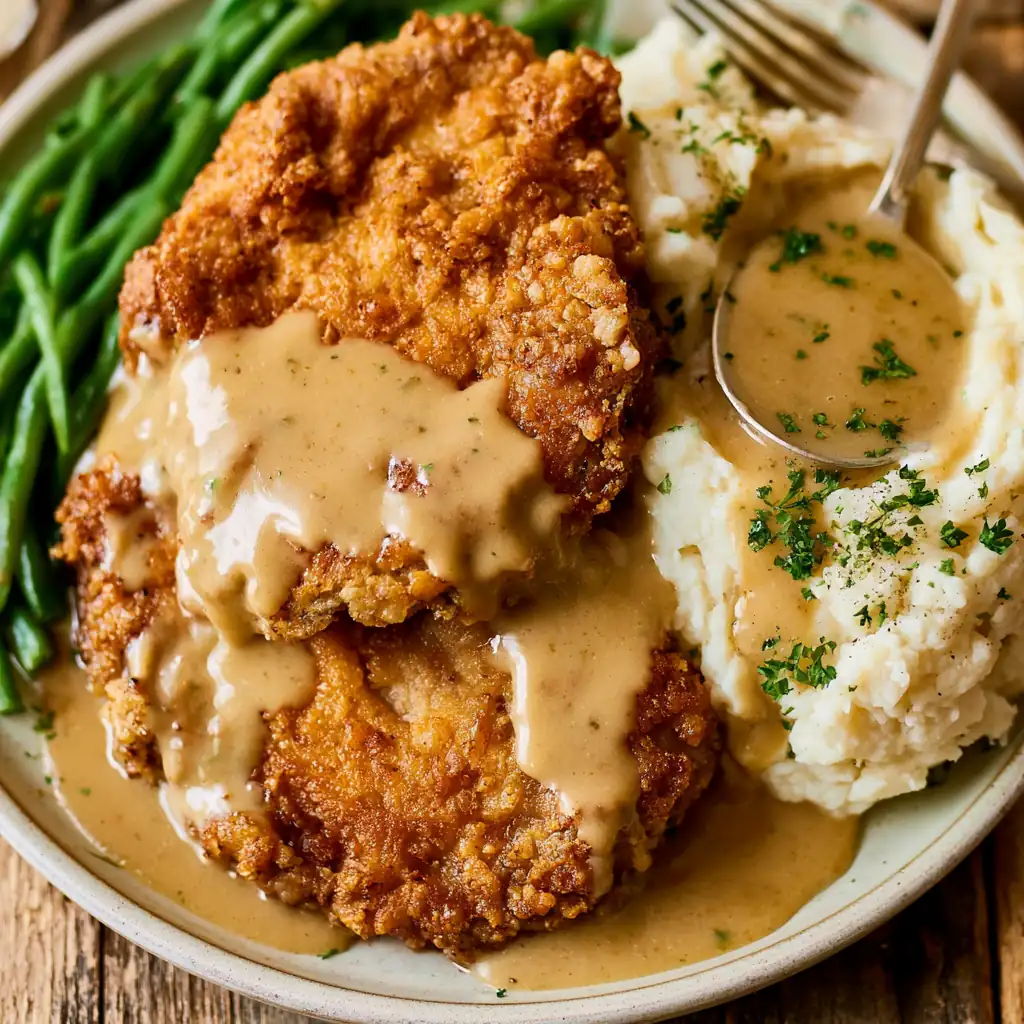
Country Fried Chicken brings crisp, golden breading and juicy chicken breasts together in one satisfying skillet dinner. A seasoned buttermilk marinade tenderizes every piece, while flour, breadcrumbs, paprika, black pepper, and cayenne create a crunchy coating. Although this meal tastes like classic Southern restaurant food, you can prepare it with familiar pantry staples. Serve the chicken with mashed potatoes, warm biscuits, vegetables, and plenty of fried chicken gravy for a complete family supper. With careful breading, steady oil temperature, and a short resting period, each chicken breast cooks evenly and keeps its crust firmly attached from skillet to plate.
Story
Country Fried Chicken has always felt like a Sunday supper, even when I make it on a regular weeknight. The sound of breaded chicken sizzling in a cast-iron skillet immediately fills the kitchen with the promise of something hearty and familiar. Unlike bone-in fried chicken, this recipe uses flattened boneless breasts, so every portion cooks quickly and evenly. I also love how easily the recipe fits alongside creamy potatoes, corn, green beans, or biscuits. Most importantly, the buttermilk gives Country Fried Chicken a tender center without requiring complicated preparation. The seasoned breading adds enough pepper and cayenne to taste lively, yet it remains mild enough for a family meal. Furthermore, resting the coated chicken before frying helps the crust cling to the meat instead of floating away in the oil. That small step makes this country fried chicken breast recipe much more dependable. Whenever the family asks for filling comfort food recipes, Country Fried Chicken delivers the crisp texture, savory flavor, and old-fashioned character everyone wants.
Ingredients
These ingredients make four generous servings. Use breasts that have a similar size whenever possible because equal portions cook at approximately the same rate. Plain breadcrumbs create a clean, classic flavor, while Italian breadcrumbs add herbs. Choose vegetable or canola oil with a neutral taste and a high smoke point.
- 4 boneless, skinless chicken breasts
- 1½ cups vegetable oil, plus more if needed for the skillet
For the Buttermilk Marinade
- 2 cups buttermilk
- 2 large eggs, whisked
- 3 teaspoons salt
For the Seasoned Breading
- 1½ cups all-purpose flour
- ½ cup plain or Italian breadcrumbs
- 2½ teaspoons seasoned salt
- ¾ teaspoon paprika
- ½ teaspoon cayenne pepper
- 1½ teaspoons ground black pepper
Step-by-Step Instructions
Follow the preparation and cooking order closely because each stage supports a crisp coating and tender center. In particular, flatten the chicken evenly, give the marinade enough time to work, and let the breaded pieces rest before they enter the hot oil.
Preparing the Ingredients
Place one chicken breast between two sheets of plastic wrap. Pound it with the flat side of a meat mallet until it reaches an even ½-inch thickness. Repeat with the remaining breasts. Next, pat every piece dry with paper towels. Whisk the buttermilk, eggs, and salt in a shallow dish or covered container. Add the chicken, turn each piece to coat it, and refrigerate it for one to two hours. For deeper flavor and tenderness, marinate it overnight. Meanwhile, combine the flour, breadcrumbs, seasoned salt, paprika, cayenne, and black pepper in a wide, shallow bowl. About 25 minutes before cooking, remove the chicken from the refrigerator. Then lift one piece from the marinade, let the excess drip away, and press it firmly into the breading. Turn it several times and push the mixture into every fold and edge. Set the coated breast on a wire rack. Repeat with the remaining pieces, and let all four rest for 15 to 20 minutes.
Cooking Instructions
Pour enough vegetable oil into a large, heavy skillet to reach halfway up the chicken. Heat the oil over medium heat until it reaches 350°F. A cast-iron skillet works especially well because it holds heat steadily. Carefully lower one or two chicken breasts into the skillet without crowding them. Fry them for four to five minutes on the first side. When the lower edges look deep golden brown, turn each breast gently with a thin spatula or tongs. Cook the second side for another four to five minutes, or until the coating turns crisp and the thickest part of the chicken reaches 165°F. Adjust the burner as needed to keep the oil near 350°F. Transfer the cooked chicken to a clean wire rack rather than paper towels, since airflow keeps the underside crisp. Let the oil return to temperature, and then fry the remaining chicken. Rest each piece for five minutes before serving.
Tips for Perfect Results
A successful batch depends more on technique than complicated ingredients. Therefore, check the chicken thickness, breading coverage, oil temperature, and internal temperature instead of relying only on cooking time. These practical details produce consistent results in nearly any home kitchen.
Common Mistakes to Avoid
Do not fry thick, uneven chicken breasts because the crust may darken before the center cooks. Likewise, avoid placing refrigerator-cold chicken directly into the skillet, since it can lower the oil temperature sharply. Never rush the breading rest; otherwise, loose flour may fall away during frying. Crowding the skillet also traps steam and prevents the surface from becoming crisp. In addition, do not flip the chicken repeatedly. Let the first side form a firm crust before you turn it once. Keep the oil near 350°F because cooler oil makes the breading greasy, while excessively hot oil burns the spices. Finally, check doneness with an instant-read thermometer. Color alone cannot confirm that a thick chicken breast has reached a safe internal temperature.
Pro Tips for Better Flavor
Season every layer rather than relying only on the breading. The salted buttermilk flavors the meat from within, while seasoned flour builds a savory crust. For a bolder taste, add ½ teaspoon each of garlic powder and onion powder to the breading. You can also stir one tablespoon of hot sauce into the marinade for gentle heat. After you coat the chicken, press a few damp crumbs from the marinade into the flour mixture; these small clusters fry into craggy, crunchy pieces. Furthermore, keep the finished chicken on a wire rack in a 200°F oven while you complete the remaining batches. For a classic finish, make a peppery gravy with a little frying oil, flour, milk, salt, and black pepper. Spoon it over the chicken immediately before serving so the crust stays crisp.
Serving and Storage
Country Fried Chicken tastes best shortly after frying, but thoughtful serving and storage choices help preserve its contrasting textures. Keep gravy separate until the last moment, and cool leftovers before placing them in a covered container.
How to Serve
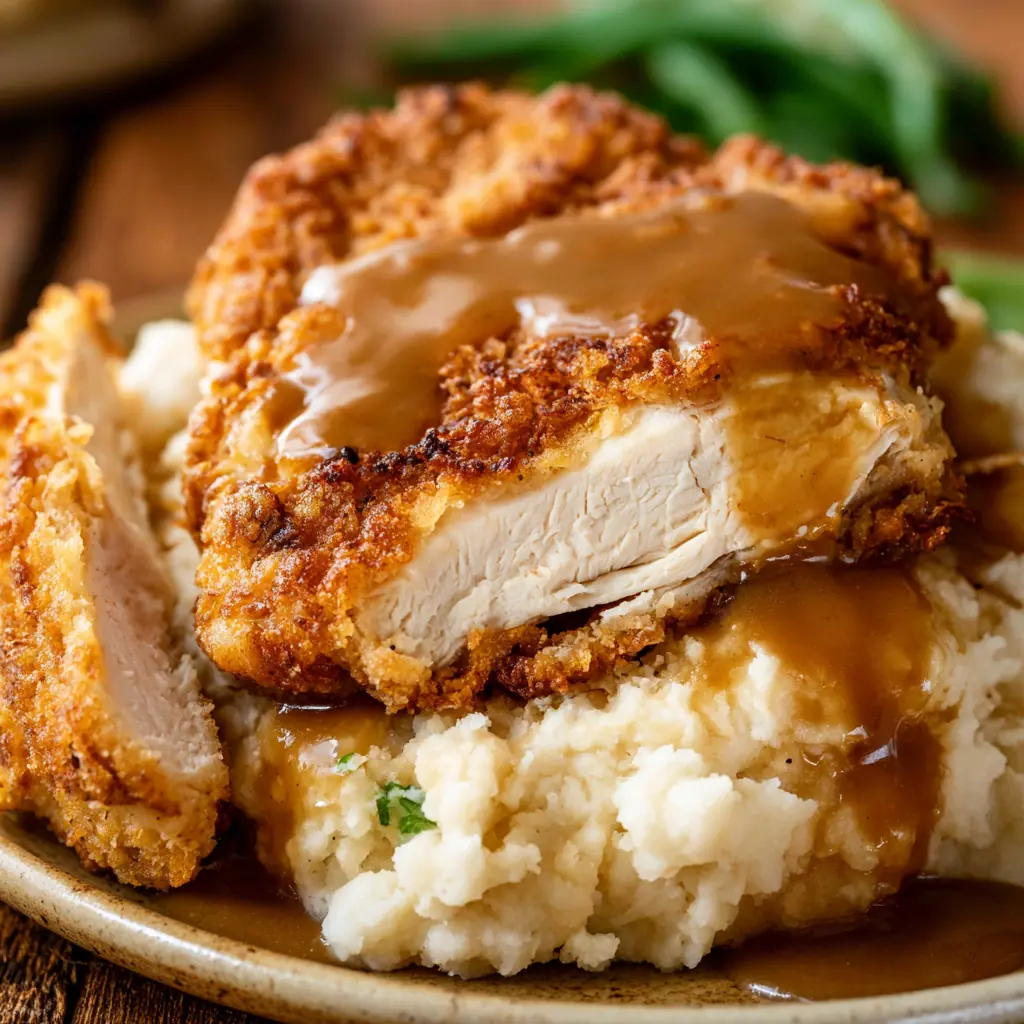
Serve the chicken hot with creamy mashed potatoes and white country gravy or brown gravy. Buttermilk biscuits, cornbread, roasted carrots, green beans, corn casserole, and coleslaw also suit the savory breading. For a lighter plate, add a crisp garden salad or steamed vegetables. This easy chicken dinner works well for family meals, casual gatherings, and weekend suppers because guests can choose their favorite sides. Place the chicken on a warm platter, garnish it with chopped parsley if desired, and offer the gravy in a pitcher. That approach lets everyone control the amount while protecting the crunchy coating. Add hot sauce, honey, or pepper jelly at the table for an optional sweet or spicy contrast.
How to Store Leftovers
Let leftover chicken cool completely, and then place it in a shallow airtight container. Refrigerate it for up to three days. Keep gravy in a separate covered container because moisture softens the breading. For the best reheated texture, arrange the chicken on a wire rack over a baking sheet and warm it in a 375°F oven for 12 to 15 minutes. An air fryer also works well at 350°F for five to eight minutes. Heat the gravy gently in a saucepan, adding a splash of milk if it becomes too thick. Avoid reheating the chicken in the microwave whenever crispness matters. You may freeze cooled chicken for up to two months, although the coating will lose some crunch. Thaw it overnight in the refrigerator before reheating.
Conclusion
Country Fried Chicken turns simple ingredients into a filling meal with crisp breading, tender meat, and plenty of homestyle flavor. Because the recipe uses boneless breasts, it cooks faster than traditional bone-in fried chicken while still offering the crunch everyone expects. Give the chicken time to marinate, press on the seasoned coating, rest it on a rack, and monitor the oil carefully. Then serve it with mashed potatoes, vegetables, biscuits, and warm gravy. Add this recipe to your collection of dependable chicken breast recipes, and bring a restaurant-style comfort dinner to your own table.
Discover more delicious recipes by following me on Facebook and Pinterest.
Frequently Asked Questions
Can I Make Country Fried Chicken Without Buttermilk?
Yes. Combine two tablespoons of white vinegar or lemon juice with enough milk to make two cups, and let the mixture stand for 10 minutes. You can also mix ½ cup milk with 1½ cups sour cream. Another option combines four tablespoons of milk with enough plain yogurt to equal two cups. Each substitute adds acidity, which helps tenderize the chicken and supports a flavorful coating. However, regular buttermilk provides the most traditional consistency and tang.
Why Does the Breading Fall Off the Chicken?
Breading usually falls off when the chicken remains overly wet, the coating does not receive firm pressure, or the breaded pieces enter the oil immediately. Let excess marinade drip away, press the flour mixture onto every surface, and place the coated chicken on a wire rack for 15 to 20 minutes. Additionally, wait until the oil reaches 350°F before frying. Turn the chicken only after the first side forms a sturdy golden crust.
Can I Bake Country Fried Chicken Instead of Frying It?
You can bake it, although the coating will not develop the same rich color and skillet-fried crunch. Arrange the breaded chicken on an oiled wire rack over a baking sheet, spray the surface lightly with cooking oil, and bake it at 425°F. Turn the pieces halfway through cooking and continue until the crust browns and the chicken reaches 165°F. Depending on thickness, the process usually takes 20 to 25 minutes.

Country Fried Chicken
- Total Time: 1 hour 5 minutes
- Yield: 4 servings 1x
Description
Country Fried Chicken features tender buttermilk-marinated chicken breasts coated in seasoned flour and breadcrumbs, then skillet-fried until crisp and golden. Serve it with mashed potatoes, biscuits, vegetables, and warm country gravy for a satisfying family dinner.
Ingredients
- 4 boneless, skinless chicken breasts
- 1 1/2 cups vegetable oil, plus more if needed
- 2 cups buttermilk
- 2 large eggs, whisked
- 3 teaspoons salt
- 1 1/2 cups all-purpose flour
- 1/2 cup plain or Italian breadcrumbs
- 2 1/2 teaspoons seasoned salt
- 3/4 teaspoon paprika
- 1/2 teaspoon cayenne pepper
- 1 1/2 teaspoons ground black pepper
Instructions
- Place each chicken breast between two sheets of plastic wrap and pound it to an even 1/2-inch thickness.
- Pat the chicken dry with paper towels.
- Whisk the buttermilk, eggs, and salt in a shallow dish or covered container.
- Add the chicken, turn to coat, and refrigerate for 1 to 2 hours or overnight.
- Remove the chicken from the refrigerator about 25 minutes before frying.
- Combine the flour, breadcrumbs, seasoned salt, paprika, cayenne pepper, and black pepper in a wide bowl.
- Lift each chicken breast from the marinade, let excess liquid drip away, and press it firmly into the breading.
- Turn the chicken several times until every surface looks dry and evenly coated.
- Place the breaded chicken on a wire rack and let it rest for 15 to 20 minutes.
- Pour enough vegetable oil into a heavy skillet to reach halfway up the chicken.
- Heat the oil to 350°F over medium heat.
- Fry one or two chicken breasts for 4 to 5 minutes on the first side without crowding the skillet.
- Turn each breast carefully and fry for another 4 to 5 minutes.
- Cook until the crust turns golden and the thickest part of the chicken reaches 165°F.
- Transfer the chicken to a clean wire rack and let excess oil drain.
- Let the oil return to 350°F before frying the remaining chicken.
- Rest the cooked chicken for 5 minutes, then serve it with gravy and your preferred side dishes.
Notes
- Pound every chicken breast to an even thickness so the meat cooks at the same rate.
- For a buttermilk substitute, combine 2 tablespoons white vinegar or lemon juice with enough milk to make 2 cups and let it stand for 10 minutes.
- You can also combine 1/2 cup milk with 1 1/2 cups sour cream.
- Letting the breaded chicken rest for 15 to 20 minutes helps the coating cling during frying.
- Maintain an oil temperature near 350°F for a crisp coating that does not become greasy.
- Keep the cooked chicken on a wire rack rather than paper towels to prevent a soggy underside.
- Store leftovers in an airtight container in the refrigerator for up to 3 days.
- Reheat leftover chicken in a 375°F oven for 12 to 15 minutes or in a 350°F air fryer for 5 to 8 minutes.
- Prep Time: 25 minutes
- Cook Time: 40 minutes
- Category: Dinner
- Method: Skillet Frying
- Cuisine: Southern American
Nutrition
- Serving Size: 1 chicken breast
- Calories: 348
- Sugar: 1
- Sodium: 555
- Fat: 20
- Saturated Fat: 14
- Unsaturated Fat: 6
- Trans Fat: 0
- Carbohydrates: 14
- Fiber: 1
- Protein: 27
- Cholesterol: 82