
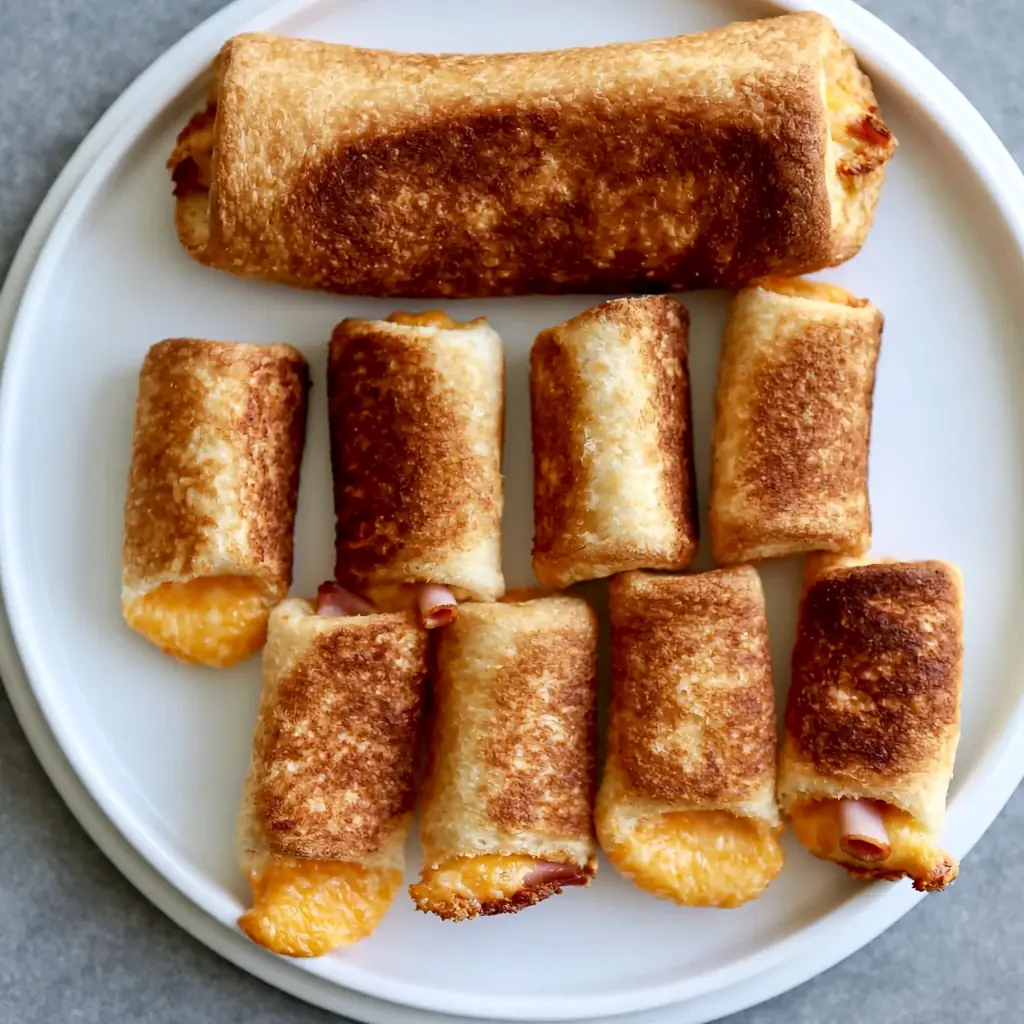
Grilled Cheese Roll-Ups turn the classic skillet sandwich into a fun, dippable meal with buttery bread, melted cheese, and an optional layer of thin ham. Because each slice rolls into a crisp golden tube, kids can pick them up easily, and adults can serve them as a snack, lunch, or casual party bite. This recipe works well when you need a Fun Kids Lunch Idea, Easy Cheese Roll-Ups, Picky Eater Recipes, or a Quick Cheese Dinner that still feels warm, homemade, and satisfying.
Story
I first made Grilled Cheese Roll-Ups on a busy game night when everyone wanted grilled cheese, yet nobody wanted to sit down with a full sandwich. Instead of stacking bread and cheese, I trimmed soft bread, rolled it thin, filled it, and browned each roll in butter. The result tasted familiar but felt more playful. Since then, Grilled Cheese Roll-Ups have become one of my easiest lunch tricks because they cook fast, dip beautifully, and disappear from the plate. Grilled Cheese Roll-Ups also help when picky eaters want something simple, since the filling stays mild and melty. Plus, Grilled Cheese Roll-Ups fit parties, after-school snacks, board game nights, and quick dinners without much cleanup. Because the rolls cook individually, you can customize each one without making separate meals. Add ham to a few, keep others cheese-only, or use different cheeses for different tastes. That flexibility makes the recipe especially useful for families, since everyone gets a warm roll that feels made for them. It also makes cleanup simple, because you only need one board, one skillet, and a pair of tongs. Afterward, the pan wipes clean with almost no stuck-on mess. too.
Ingredients
- 6 slices soft white bread or soft sandwich bread
- 1 cup thinly shredded cheddar, mozzarella, Colby Jack, or American-style melting cheese
- 6 thin slices ham, optional
- 2 tablespoons butter, plus a little extra if the skillet looks dry
- Tomato soup, ranch, marinara, or ketchup for dipping, optional
Step-by-Step Instructions
Grilled Cheese Roll-Ups need soft bread, a rolling pin, a knife, a skillet or griddle, tongs, and toothpicks if the rolls will not stay closed. Before cooking, place everything near the stove so the butter does not brown too quickly while you assemble the rolls. Work gently, because thin bread rolls best when you flatten it evenly and keep the filling light. Also, use medium to medium-low heat, since this temperature gives the cheese time to melt while the bread turns crisp instead of scorching.
Preparing the Ingredients
Trim the crust from each bread slice, then save the crusts for breadcrumbs or toast sticks. Next, roll every slice flat with a rolling pin until it looks thin and flexible. Sprinkle a light layer of shredded cheese over the bread, leaving a small border at the far edge so the cheese does not spill out. Add one thin slice of ham, if using, and press it gently into the cheese. Then roll the bread tightly from one side to the other. If a roll opens, secure it with a toothpick, but remove it before serving.
Cooking Instructions
Heat a skillet or griddle over medium to medium-low heat, then add the butter and let it melt. Place the Grilled Cheese Roll-Ups seam-side down in the pan so they seal as they cook. Turn them with tongs every minute or two, browning all sides for 5 to 8 minutes total. The rolls should look golden, crisp, and lightly buttery, while the cheese inside turns soft and melted. Move them to a cutting board, let them rest for one minute, then slice them in half if you want smaller bites. Serve warm with your favorite dip.
Tips for Perfect Results
The best Grilled Cheese Roll-Ups start with fresh, soft bread because dry slices crack when rolled. Thin shredded cheese melts faster than large shreds, so it gives you a creamy center before the bread gets too dark. Also, do not pack in too much filling. A modest amount of cheese and ham keeps each roll tight, neat, and easy to brown. Finally, cook slowly. Higher heat may toast the outside fast, but medium-low heat gives you the crisp shell and melted middle that make this recipe so good.
Common Mistakes to Avoid
Avoid thick, crusty bread because it fights the rolling step and tears at the edges. Also, do not skip flattening the bread; flat slices wrap more tightly around the filling and brown more evenly. Another common mistake involves adding too much cheese, which can leak into the skillet and burn. If that happens, wipe the pan between batches and add fresh butter. In addition, do not walk away while the rolls cook. Since Grilled Cheese Roll-Ups are small, they brown quickly, so turn them often for even color.
Pro Tips for Better Flavor
For deeper flavor, use a blend of sharp cheddar and mozzarella, since cheddar brings tang while mozzarella adds stretch. You can also brush melted butter on the rolls before cooking instead of dropping all the butter into the skillet. For a savory twist, add a very thin smear of Dijon mustard under the ham or sprinkle the cheese with a pinch of garlic powder. However, keep additions light so the rolls stay closed. For extra crunch, let each side sit against the pan until it turns golden before rotating.
Serving and Storage
Grilled Cheese Roll-Ups taste best hot from the skillet, when the bread still crackles and the cheese pulls slightly. Even so, they also work well as a lunchbox-style snack when packed with a small container of dip. If serving a crowd, cook in batches and keep the finished rolls on a warm plate while the next batch browns. Since this recipe makes 6 rolls, or 12 halves, it serves about 3 people as a lunch or snack. Double it easily for parties, sleepovers, or a game day tray.
How to Serve
Serve Grilled Cheese Roll-Ups with tomato soup for the most classic pairing, or offer ranch, marinara, barbecue sauce, or ketchup for dipping. For lunch, add apple slices, grapes, carrot sticks, cucumber rounds, or a simple green salad to balance the richness. For game day, cut each roll in half, stand the pieces on a platter, and set out two or three dips so guests can choose. These rolls also pair nicely with pickles, fruit salad, roasted vegetables, or a small bowl of creamy tomato bisque.
How to Store Leftovers
Let leftover Grilled Cheese Roll-Ups cool completely, then place them in an airtight container and refrigerate them for up to 3 days. To reheat, skip the microwave when possible because it softens the bread. Instead, warm the rolls in a dry skillet over medium-low heat for a few minutes, turning until the outside crisps again and the cheese melts. You can also reheat them in an air fryer at 350°F for 3 to 4 minutes. Add a small pat of butter to the skillet if the bread looks dry.
Conclusion
Grilled Cheese Roll-Ups make a familiar comfort food feel fresh, fun, and easy to share. With only bread, cheese, butter, and optional ham, you can turn basic ingredients into crisp, golden rolls in 18 minutes. They fit lunch, snacks, appetizers, game nights, and quick dinners, and they taste even better with a bowl of tomato soup or a favorite dip. Try them once, and you may find that this playful twist becomes your new favorite way to make grilled cheese.
Discover more delicious recipes by following me on Facebook and Pinterest.
Frequently Asked Questions
Can I make Grilled Cheese Roll-Ups without ham?
Yes, you can make Grilled Cheese Roll-Ups without ham and still get a warm, cheesy, crisp result. Simply add cheese to the flattened bread, roll it tightly, and cook it in butter as directed. For more flavor without meat, add a thin sprinkle of garlic powder, a little Parmesan, or a tiny swipe of mustard. Keep the filling light so the rolls stay sealed and easy to turn.
What cheese works best for Grilled Cheese Roll-Ups?
American cheese, cheddar, Colby Jack, mozzarella, and Monterey Jack all work well because they melt smoothly. Thin shredded cheese melts quickly, while slices give a neat, even filling. If you use sharper cheese, pair it with a milder melting cheese so the center stays creamy. Avoid hard, dry cheeses as the main filling because they may not melt before the bread finishes browning.
Can I make Grilled Cheese Roll-Ups ahead of time?
You can assemble Grilled Cheese Roll-Ups a few hours ahead, cover them tightly, and refrigerate them until cooking time. For the best texture, cook them right before serving so the bread turns crisp and the cheese melts properly. If you need to cook them ahead, reheat them in a skillet or air fryer instead of the microwave. This brings back the buttery crunch and keeps the rolls tasting fresh.


Grilled Cheese Roll-Ups
- Total Time: 18 minutes
- Yield: 3 servings 1x
Description
Grilled Cheese Roll-Ups are buttery, crisp, and cheesy skillet rolls made with soft bread, shredded cheese, optional ham, and a quick 18-minute cooking time.
Ingredients
- 6 slices soft white bread or soft sandwich bread
- 1 cup thinly shredded cheddar, mozzarella, Colby Jack, or American-style melting cheese
- 6 thin slices ham, optional
- 2 tablespoons butter, plus a little extra if the skillet looks dry
- Tomato soup, ranch, marinara, or ketchup for dipping, optional
Instructions
- Trim the crust from each slice of bread and save the crusts for breadcrumbs or toast sticks.
- Roll each bread slice flat with a rolling pin until thin and flexible.
- Sprinkle a light layer of shredded cheese over each slice, leaving a small border at the far edge.
- Add one thin slice of ham, if using, and press it gently into the cheese.
- Roll each slice tightly from one side to the other and secure with toothpicks if needed.
- Heat a skillet or griddle over medium to medium-low heat and melt the butter.
- Place the roll-ups seam-side down in the skillet so they seal as they cook.
- Cook for 5 to 8 minutes, turning often with tongs, until all sides look golden and crisp.
- Move the roll-ups to a cutting board and rest for 1 minute.
- Cut in half if desired and serve warm with tomato soup, ranch, marinara, or ketchup.
Notes
- Nutrition estimate includes ham.
- One serving equals 2 uncut roll-ups or 4 halves.
- Use soft, fresh bread for the easiest rolling.
- Do not overfill the bread or the cheese may leak into the skillet.
- Save the trimmed crusts for breadcrumbs, toast sticks, or another snack.
- Prep Time: 10 minutes
- Cook Time: 8 minutes
- Category: Appetizer, Lunch, Snack
- Method: Skillet
- Cuisine: American
Nutrition
- Serving Size: 2 roll-ups
- Calories: 321
- Sugar: 3
- Sodium: 780
- Fat: 18
- Saturated Fat: 10
- Unsaturated Fat: 7
- Trans Fat: 0
- Carbohydrates: 26
- Fiber: 2
- Protein: 14
- Cholesterol: 45